CLICK PICTURE TO GET FULL SIZE
 |
 |
 |
Pic 1: Base
Tubes 3, 4, 5, 6 (counting from left to right) have 0.25" by 1.25" slots cut into them. These are for the ejection charge of the 18mm motors that will be in tubes 4 and 5. Align carefully. Use the cut out tube (folded) to fill in the gap and enough glue to make no possible exhaust leaks. (See Pic #15 for additional) Look at Pic #3 to see how the two pieces of balsa are used. HINT: If you're going to build this, read all the information first. NOTE: I switch between inches and millimeters depending on need, just indulge me please. |
Pic 2: Base, 1st Canopy
Upper Tube cover is glued on (if I had to do over, I would have put the grain perpendicular to the tubes and 1/8" balsa). First Canopy is assembled. In the Canopy Top, cut a 6mm x 85mm slot, centered and to the rear for the upper fin to be able to mount to the 29mm motor tube. Be sure your angles on the Canopy Sides are equal. Use 3 small scrapes cut to need (sorry, these were an after thought) to support the canopy top on the 29mm tube. See Pic #3 and #5. Two support pieces for each side of the cut and 1 piece in the center under the front of the Canopy Top. |
Pic 3: Base, 2nd Canopy
Be sure your angles on the canopy sides are equal. See Pic #4 so see how the Upper Canopy Outer Sides are cut at an angle. You may want to do some sanding to get a better fit on the parts. I did some, but the bulk of my sanding and filling work will come later. |
 |
 |
 |
Pic 4: Base, Side Shot
Attach Upper Canopy Front Cover. Again, most of the shaping and cleaning up will be done later. HINT: If you haven't changed your hobby knife blade yet, you should. The project should take 3-4 blades! |
Pic 5: Base, Front Shot
Measure and cut the Front Plate to cover the hole. Make it equal on both sides. HINT: I have been using Titebond Original Wood Glue for this project (except were noted). |
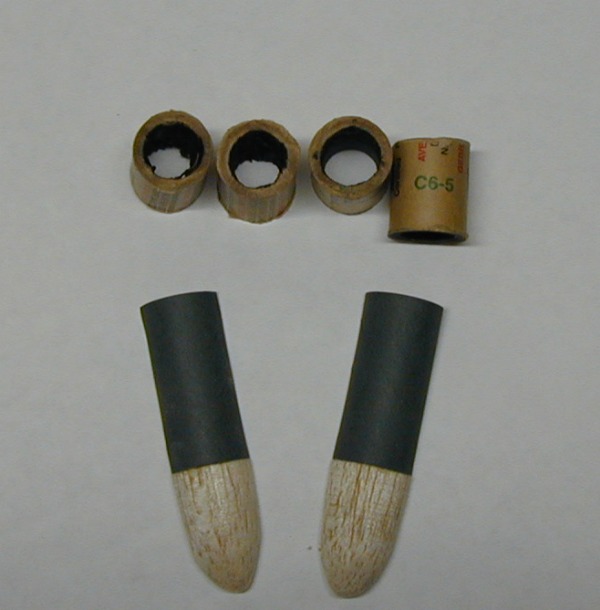
Pic 6: Pieces
Cut the 18mm Motors into four (4) 7/8" long pieces. These will be filled with clay (0.3 ounces each) or bb's (0.5 ounces each) and used in the front of tubes 3, 4, 5, and 6 for weight and to block the exhaust. Cut the nose cone in half than form and shape it to use for the side Intakes (see pic 11) |